Arch Linux is one of the most versatile GNU Linux distributions due to its simplicity and cutting-edge software packages due to its rolling release model, Arch Linux is not addressed for beginners in the Linux world.
It also provides a complicated command-line installer, with no graphical interface support. The command-line installation model makes the job of installing the system very flexible but also very difficult for Linux beginners.
On top of all, Arch Linux provides its own software package repositories via the pacman package manager. Arch Linux also provides a Multiarch environment for different CPU architectures, such as 32-bit, 64-bit, and ARM.
The software packages, dependencies, and security patches are mostly updated regularly, making Arch Linux a cutting-edge distribution with a few solid tested packages for a production environment.
Arch Linux also maintains the AUR – Arch User Repository, which is a huge community-driven software repository mirror. AUR repo mirrors allow users to compile software from sources and install it via pacman and yaourt (Yet Another User Repository Tool) package managers.
This tutorial presents a step-by-step basic Arch Linux installation process through a CD/USB bootable image on UEFI-based machines. For other customizations or details visit the Official Arch Linux Wiki page at https://wiki.archlinux.org.
Step 1: Create a Disk Partitions Layout
To get started, head to the Arch Linux download page and grab the latest ISO image. At the time of writing, the current release is Arch Linux version 2024.06.01 with Kernel 6.9 and a memory footprint of 1.1GB.
2. With the ISO image at hand, create a bootable CD/USB then plug it into your system CD/USB drive.
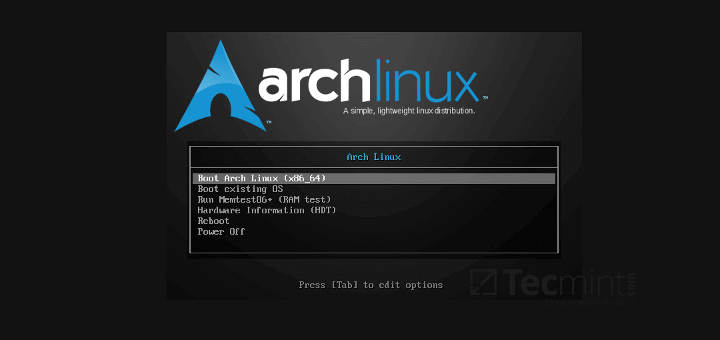
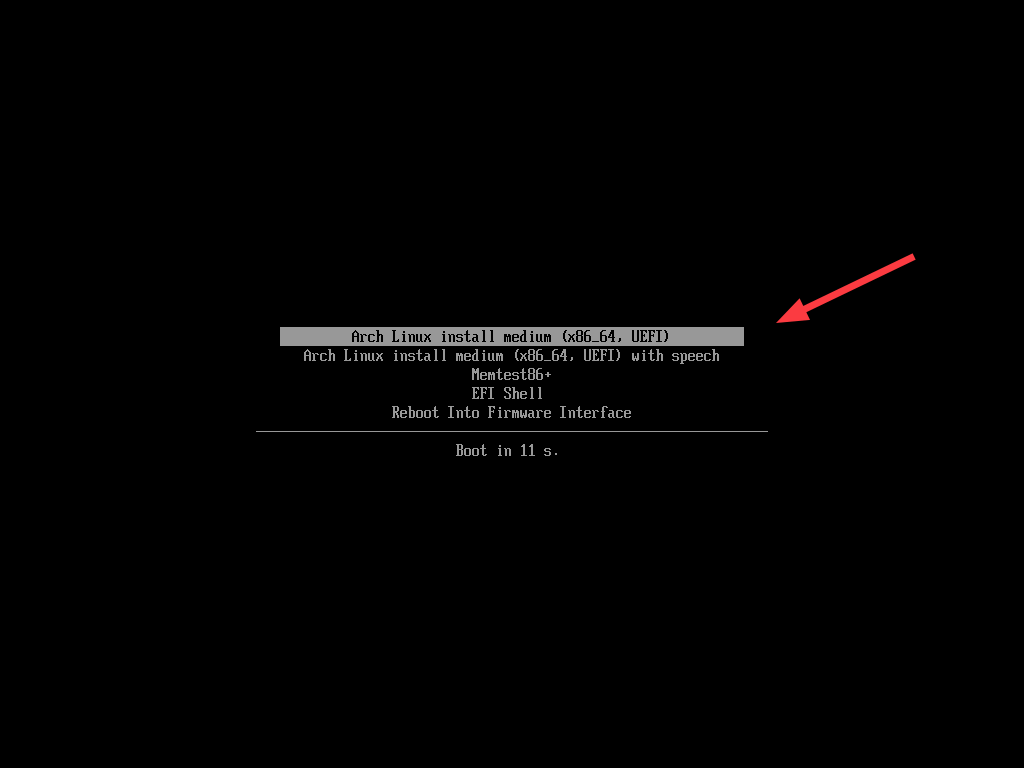
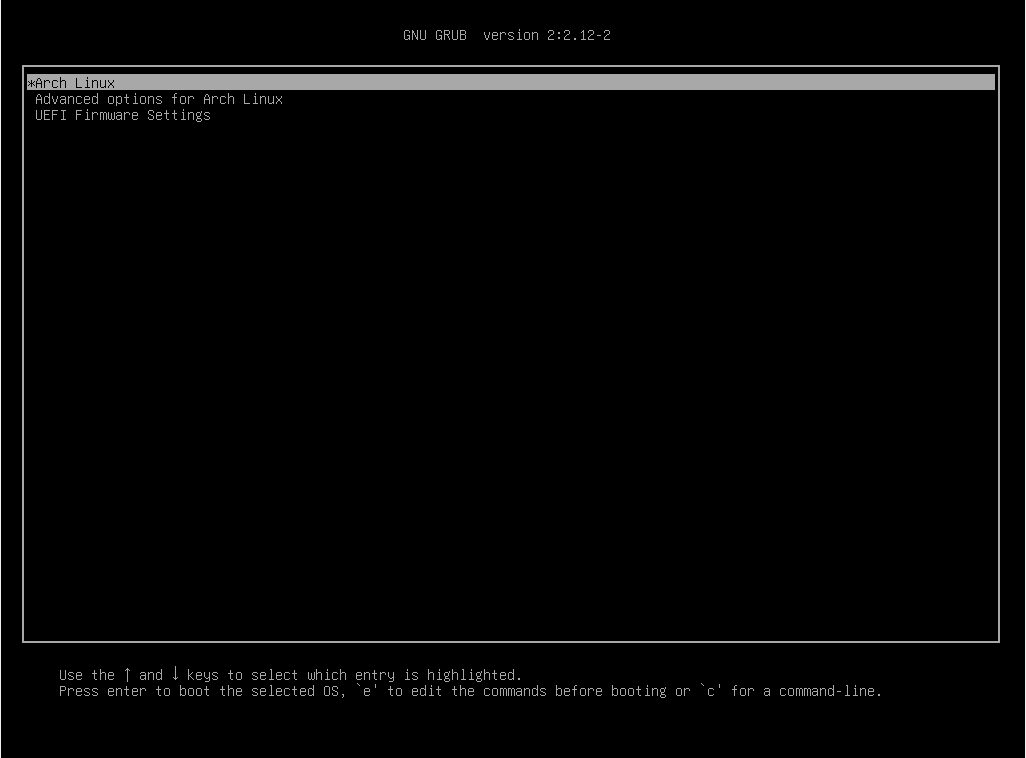
3. After the CD/USB boots up you will be presented with the first Arch Linux GRUB Installer options. Here, select the first option and press the Enter key to continue.
This will be followed by boot messages on your screen.
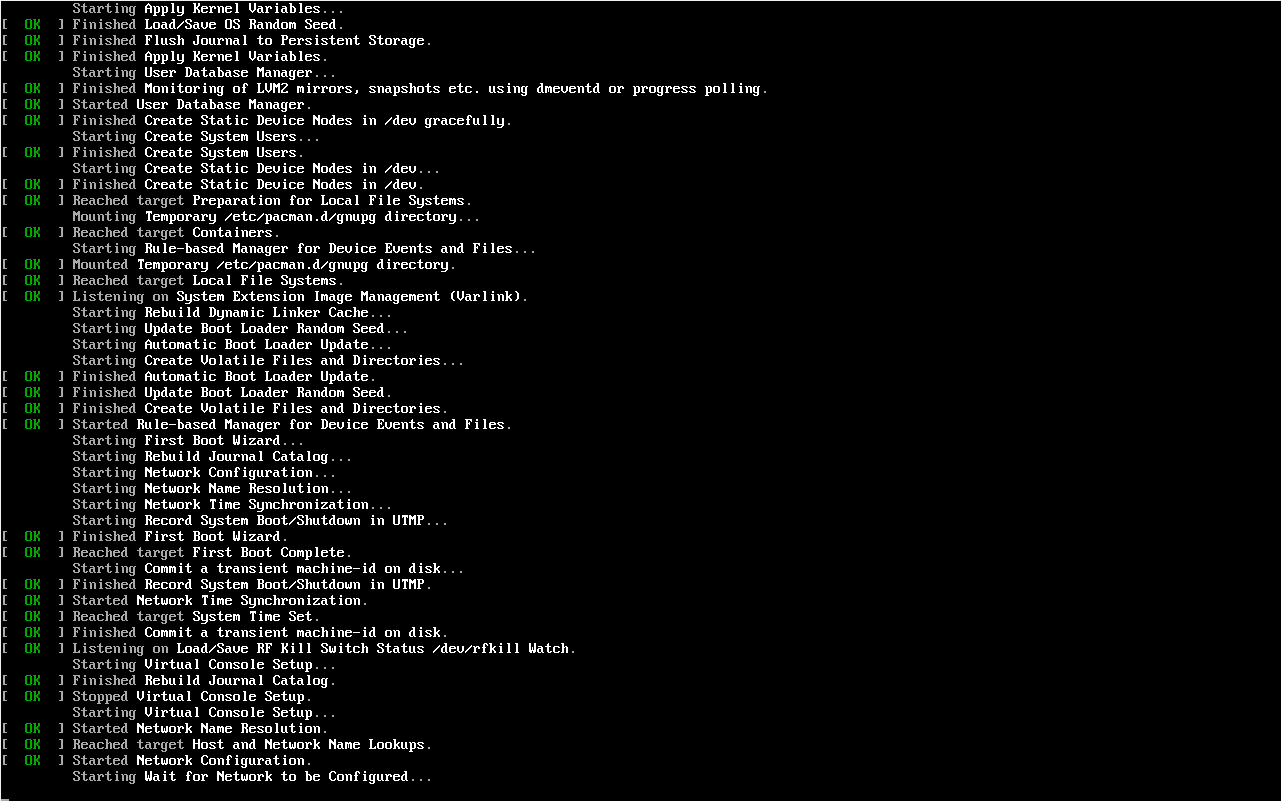
4. After the installer decompresses and loads the Linux Kernel you will be automatically thrown to an Arch Linux Bash terminal (TTY) with root privileges.
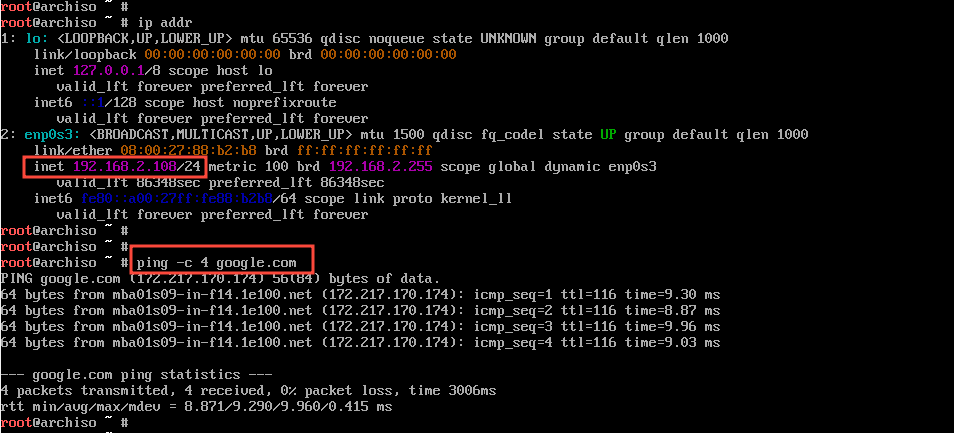
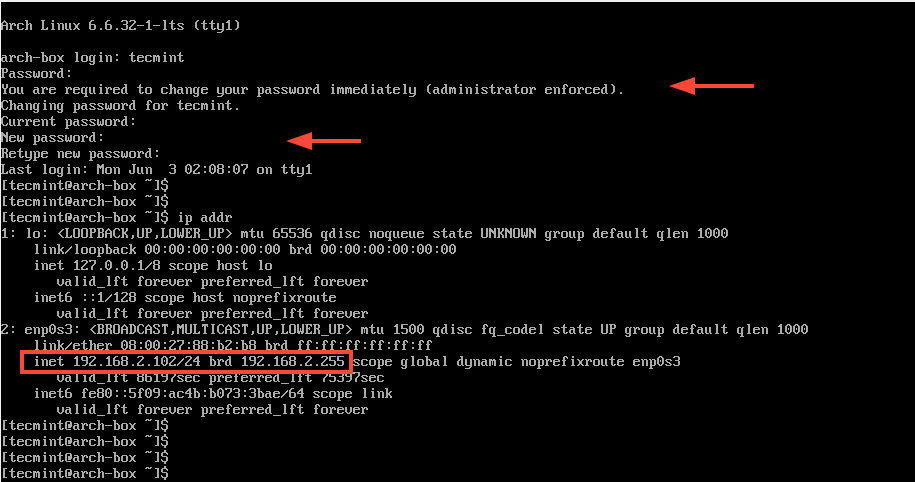
A good place to start is to check the IP configuration of your network interfaces and see whether you have internet connectivity.
ip addr
The output indicates that the active interface, enp0s3, has an IPv4 address of 192.168.2.108. This will be different in your case depending on your LAN’s IP addressing scheme.
To check internet connectivity, ping Google’s DNS (8.8.8.8).
ping -c 4 google.com
If your network is not configured to use DHCP to dynamically allocate IP addresses to clients, issue the below commands to configure an IP address manually for the Arch Live media.
ifconfig enp0s3 192.168.2.108 netmask 255.255.255.0
route add default gw 192.168.2.1
echo "nameserver 8.8.8.8" >> /etc/resolv.conf
In addition, you can list the partition block allocation information.
cat /proc/partitions
Also, you can view the hard disk naming format. If you are using iSCSI, NVMe, or SSD drives, the convention will take the format /dev/sd*.
# ls /dev/sd*
In this case, we have a single hard disk represented by the format – /dev/sda. You can run the lsblk command to list all the block volumes & CDs attached to the system in a tree-like format.
lsblk
To get comprehensive information about the hard disk, run the fdisk command.
fdisk -l
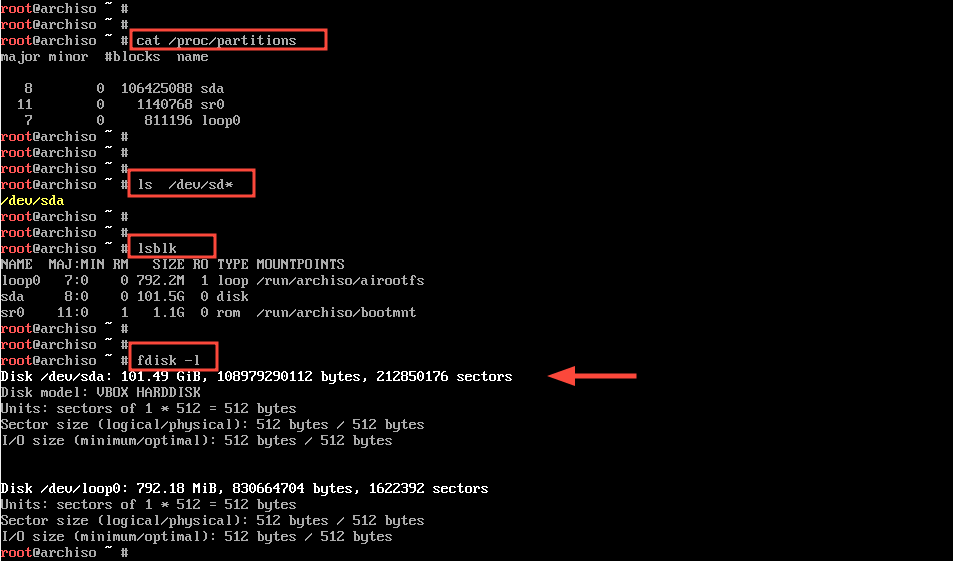
If your machine is a virtual machine, the hard disks can have other names than sdx, such as xvda, vda, etc. If you are unsure, run the command below to confirm.
ls /dev | grep '^[s|v|x][v|d]'$*
In our case, we have /dev/sda.

5. In the next step, we’ll start to configure the Hard Disk partitions. You can run the cfdisk, cgdisk, parted, or gdisk utilities to perform a disk partition layout for a GPT disk. I strongly recommend using the cfdisk utility for simplicity and ease of use.
For a basic partition, the layout table uses the following structure.
- EFI System partition (/dev/sda1) with 500M size, FAT32 formatted.
- Swap partition (/dev/sda2) with 2xRAM recommended size, Swap On.
- Root partition (/dev/sda3) with at least 20G size or rest of HDD space, ext4 formatted.
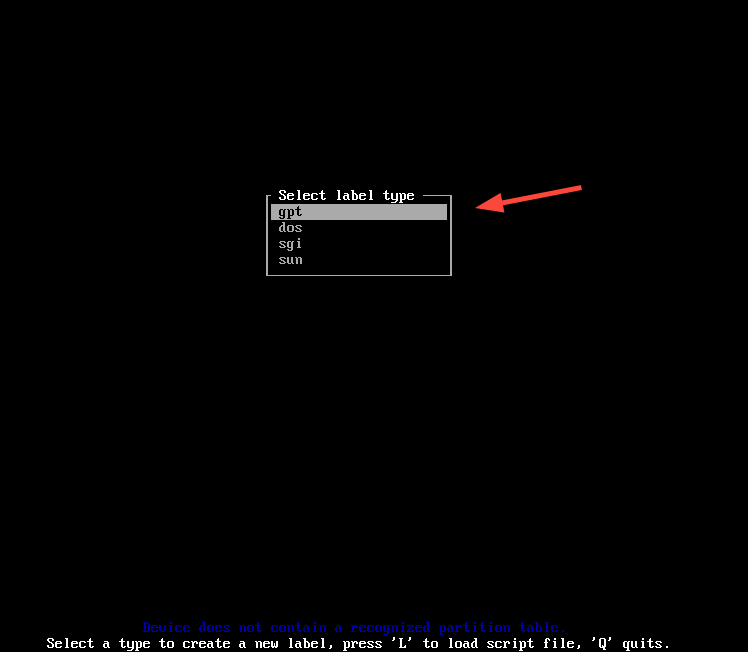
Now let’s start creating a disk layout partition table by running the cfdisk command.
cfdisk /dev/sda
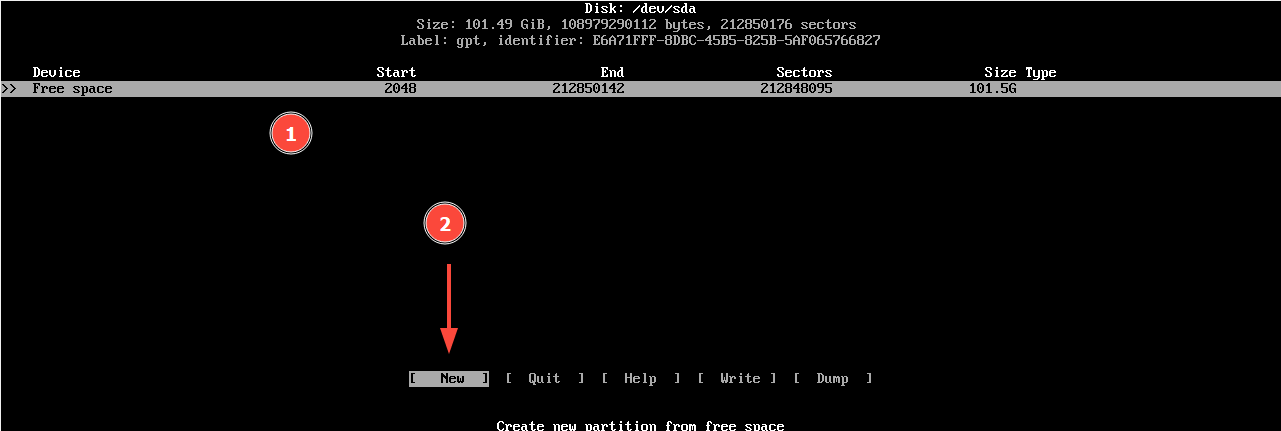
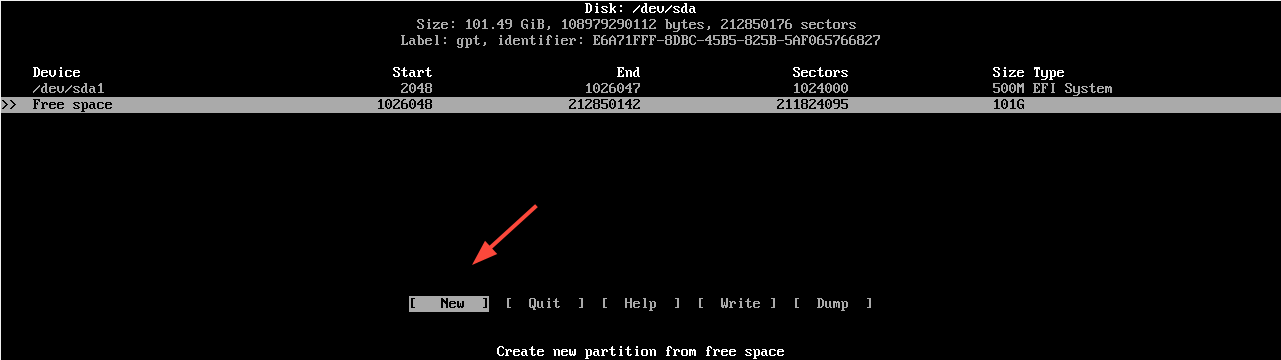
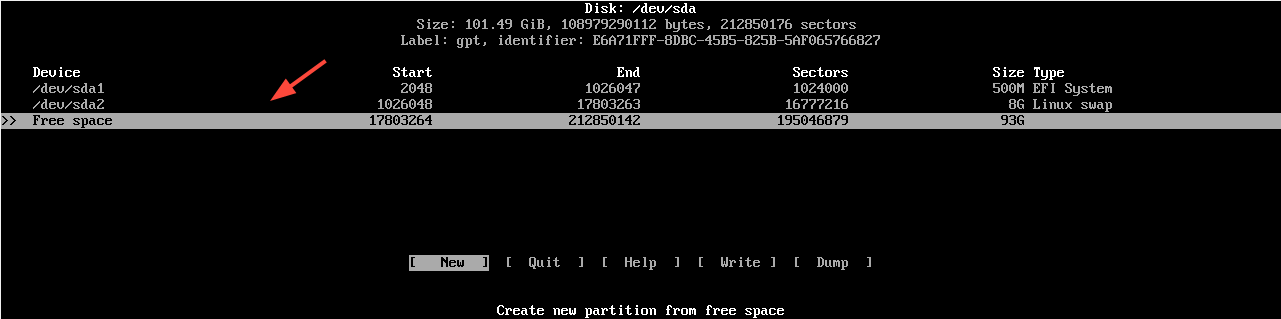
Once you run the command, you will be prompted to select the label type. select GPT, then Free Space and hit on New from the bottom menu, as illustrated.
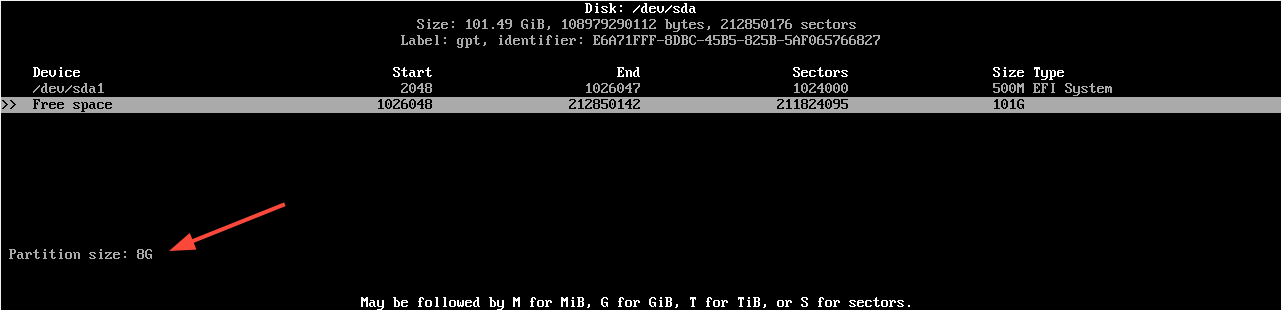
6. Type the partition size in MB (500M) and press enter key, select Type from the bottom menu, and choose EFI System partition type, as shown in the following screenshots.
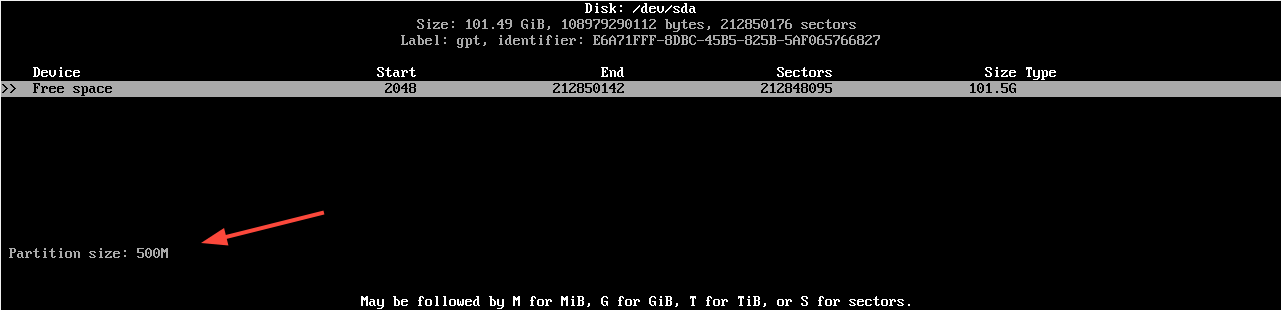
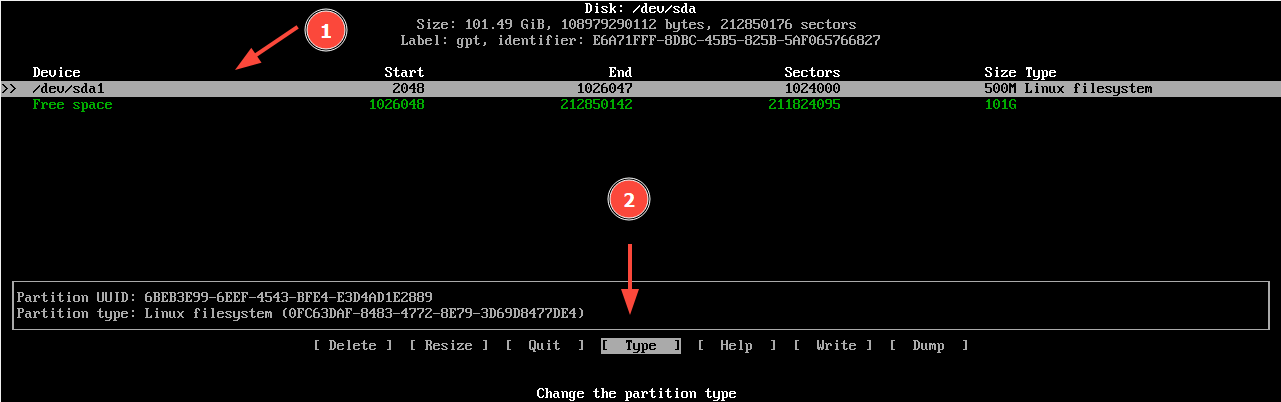

You’ve finished configuring the EFI System partition.
7. Next, let’s create the Swap partition using the same procedure. Use the down arrow key and select again the remaining Free Space.
Repeat the steps above. Select New -> partition size 2xRAM size recommended (you can safely use 1G).
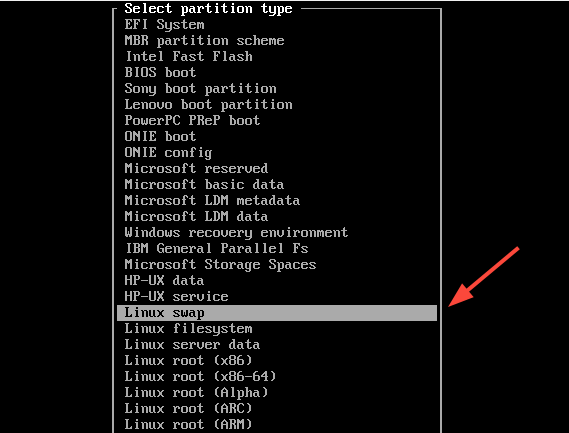
Next, select the Type option and hit ENTER.
Then select the Linux Swap option.
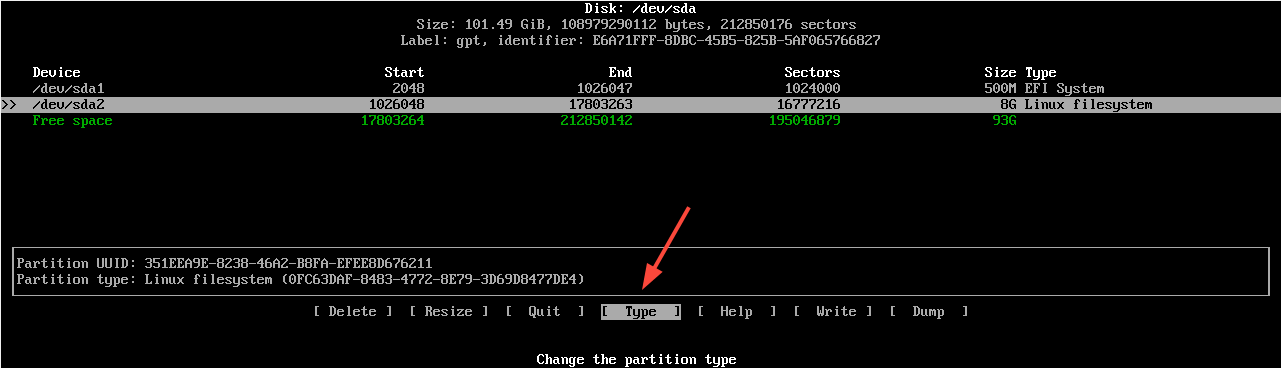
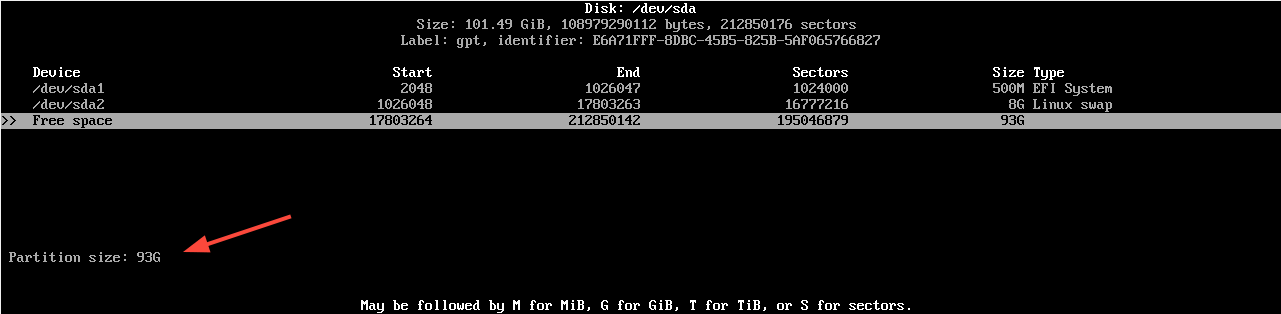
8. Finally, for /(root) partition once again, select the New option.
Specify the size. Here we will use the remaining free space which, in our case, is 93G.
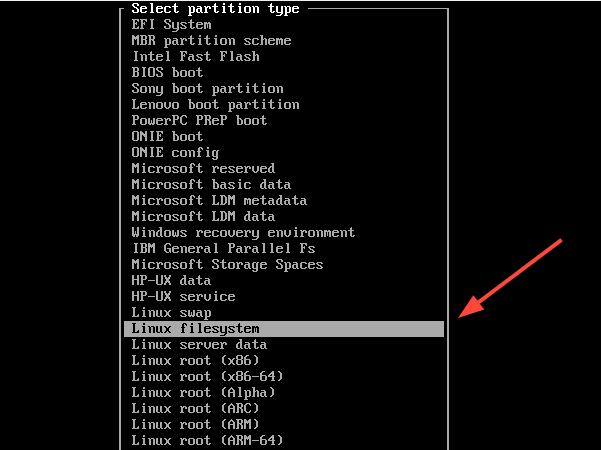
Next, select the Type option.
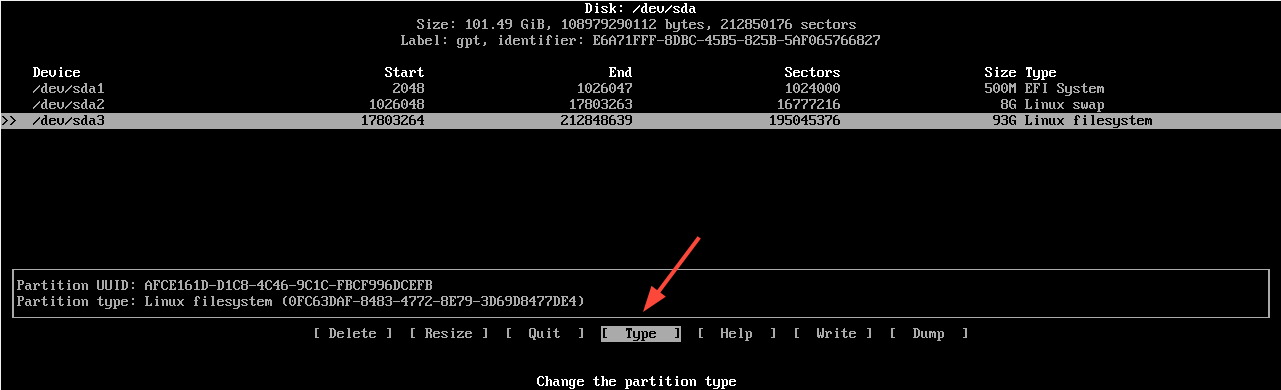
And select ‘Linux Filesystem‘.
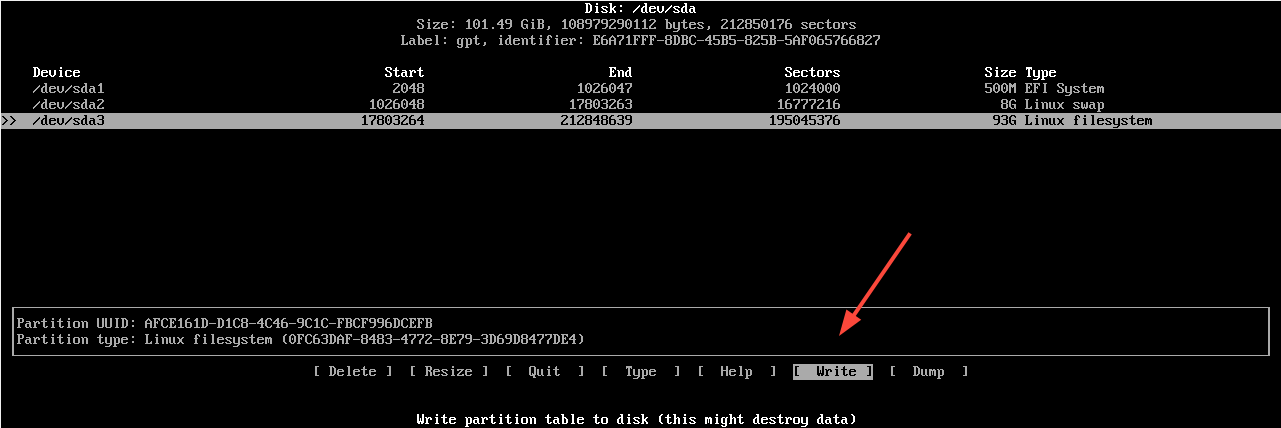
Next, select the ‘Write‘ option to save the changes and hit ENTER.
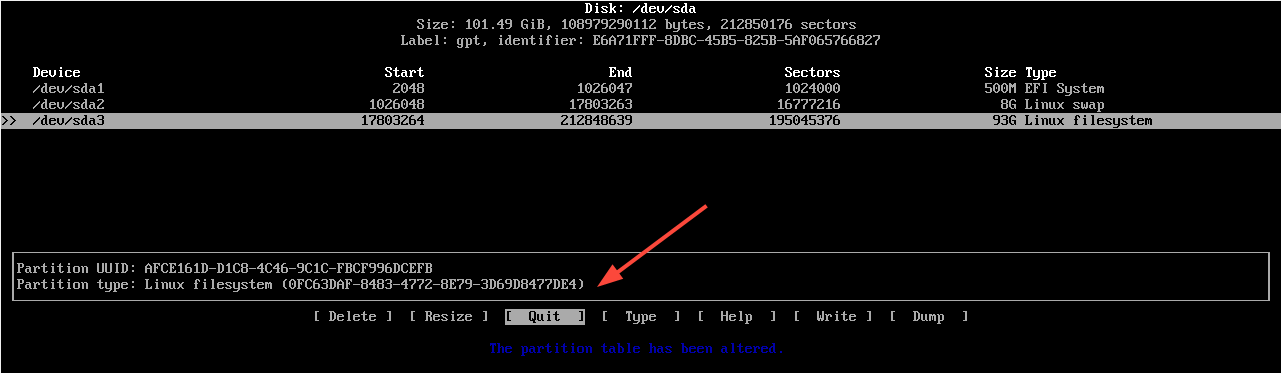
Finally, select the ‘Quit‘ option to exit the disk management console.
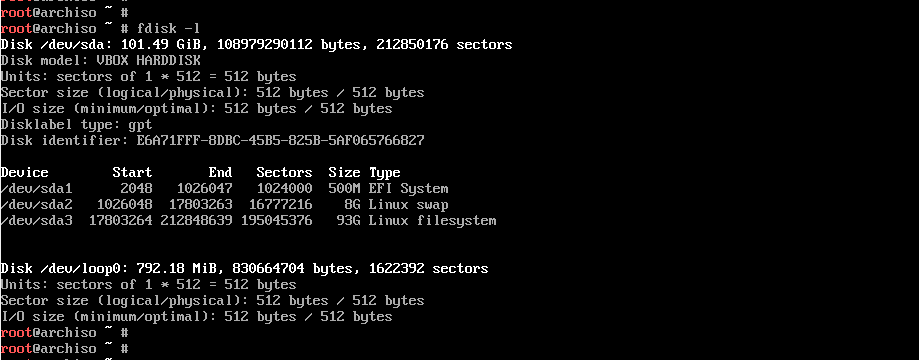
9. For now, your partition table has been written to HDD GPT but no file system has been created on top of it. You can also review the partition table summary by running the fdisk command.
fdisk -l
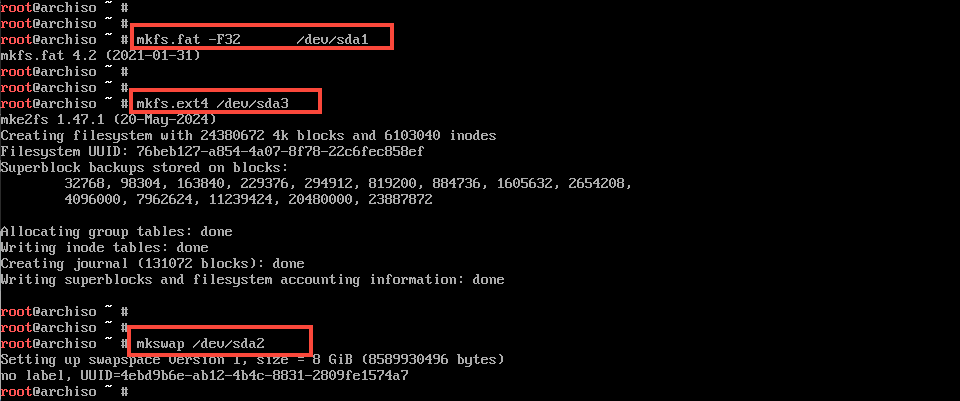
10. Now, it’s time to format the partitions with the required file systems. Issue the following commands to create a FAT32 file system for the EFI System partition (/dev/sda), to create the EXT4 file system for the root partition (/dev/sda3), and create the swap partition for /dev/sda2.
mkfs.fat -F32 /dev/sda1
mkfs.ext4 /dev/sda3
mkswap /dev/sda2
Step 2: Install Arch Linux
11. To install Arch Linux, the /(root) partition must be mounted to the /mnt directory and mount point to be accessible. Also, the swap partition needs to be initialized.
mount /dev/sda3 /mnt
swapon /dev/sda2
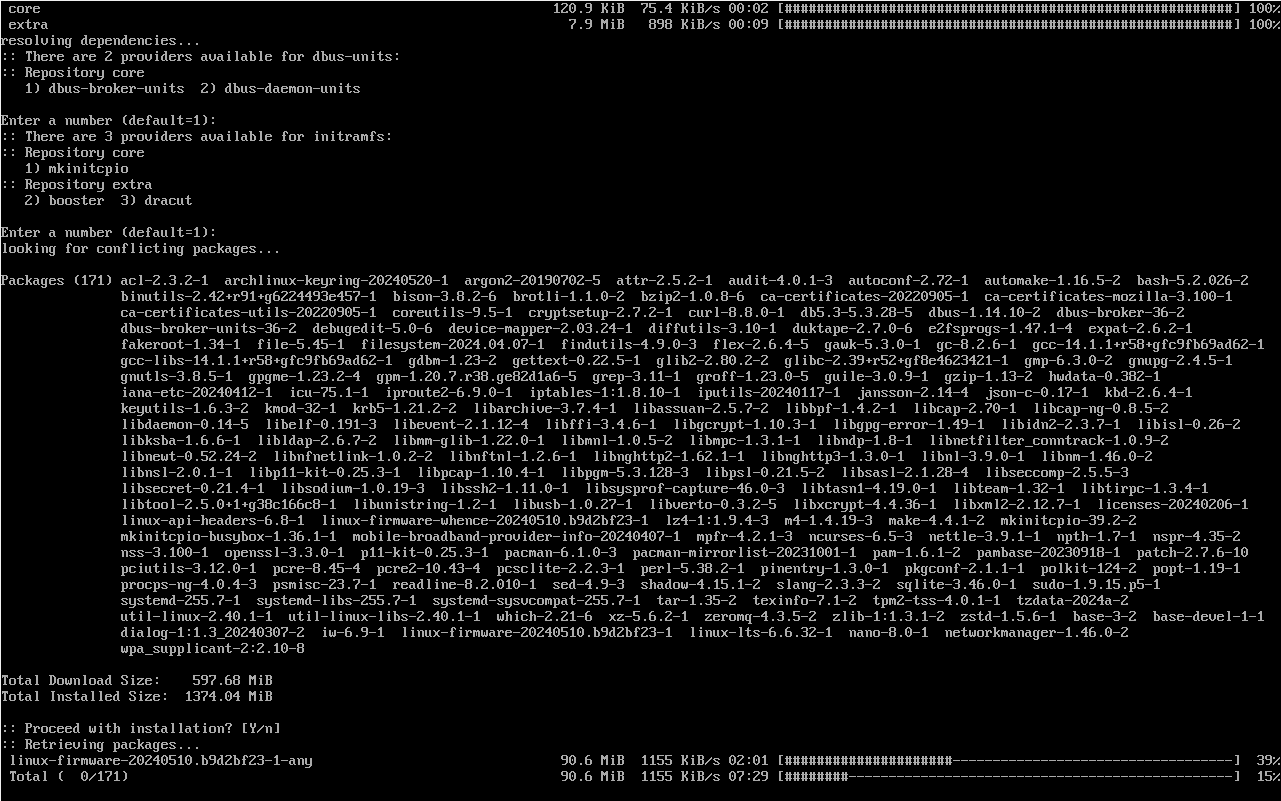
12. Next, install the base system using the following command.
pacstrap /mnt base base-devel linux-lts linux-firmware dialog iw wpa_supplicant networkmanager
Once installed, you can confirm that all the major directories required in a Linux filesystem are present by listing the contents of the /mnt directory:
ls /mnt

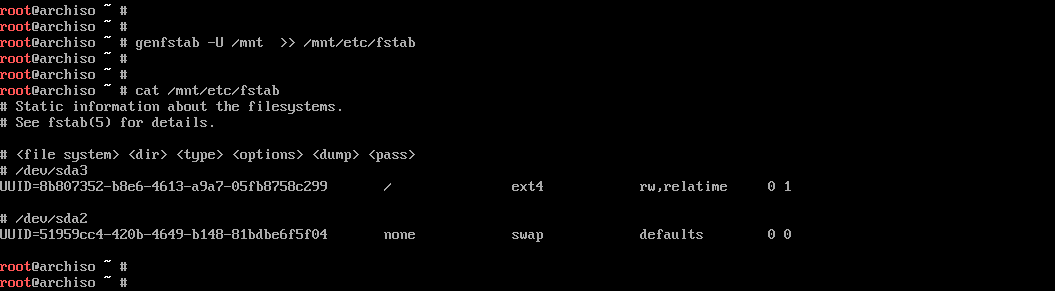
13. Next, generate the fstab file for your new Arch Linux system by issuing the following command.
genfstab -U -p /mnt >> /mnt/etc/fstab
Subsequently, inspect the fstab file content by running the below command.
cat /mnt/etc/fstab
Step 3: Arch Linux System Configuration
14. Next, to further configure Arch Linux, you must chroot into /mnt the system path and add a hostname for your system by issuing the below commands.
arch-chroot /mnt
echo "archbox-tecmint" > /etc/hostname
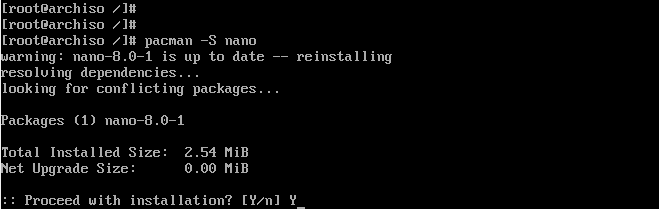
15. Next, configure your system Language.
pacman -S nano
16. Choose and uncomment your preferred encoding languages from /etc/locale.gen file then set your locale by running the following commands.
nano /etc/locale.gen
Specify your preferred locale settings by uncommenting them.

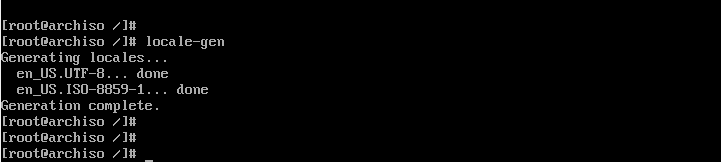
17. Generate your system language layout.
locale-gen
18. Define and export the LANG environment variable.
echo LANG=en_US.UTF-8 > /etc/locale.conf
export LANG=en_US.UTF-8
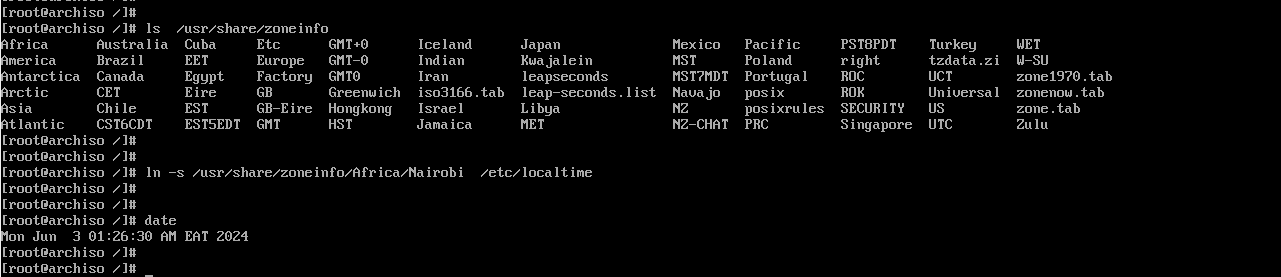
19. Next, configure the timezone. The timezones are stored in the /usr/share/zoneinfo/ directory. Configure your system time zone by creating a symlink for your sub-time zone (/usr/share/zoneinfo/Continent/Main_city) to /etc/localtime file path.
ln -s /usr/share/zoneinfo/Africa/Nairobi /etc/localtime
Run the date command to confirm your time corresponds to the set timezone.
date
20. You should also configure the hardware clock to use UTC (the hardware clock is usually set to the local time).
hwclock --systohc --utc
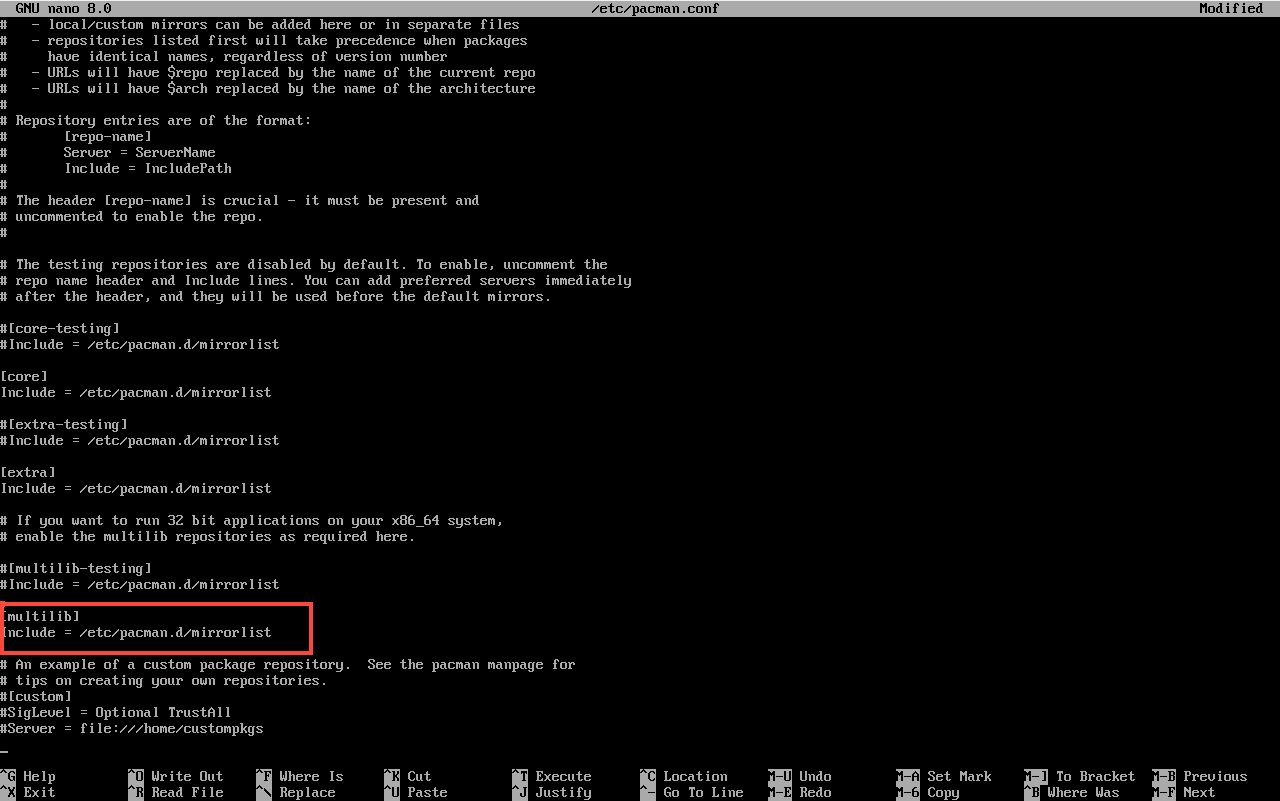
21. Like many famous Linux distributions, Arch Linux uses repo mirrors for different world locations and multiple system architectures.
The standard repositories are enabled by default, but if you want to activate Multilib repositories you must uncomment [multilib] directives from /etc/pacman.conf file, as shown in the below excerpt.
nano /etc/pacman.conf
22. After the repository file has been edited, synchronize and update database mirrors and packages by running the below command.
pacman -Syu
23. Next, set up a password for the root account and create a new user with Sudo privileges in the Arch box by issuing the commands below. Also, expire the user password to force the new user to change the password at first login.
# passwd
useradd -mg users -G wheel,storage,power -s /bin/bash your_new_user
passwd your_new_user
chage -d 0 your_new_user
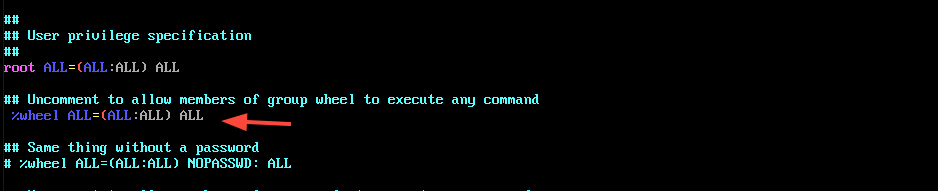
24. After the new user has been added you need to install the sudo package and update the wheel group line from /etc/sudoers file to grant root privileges to the newly added user.
Be sure to install the vim text editor and sudo package first.
pacman -S sudo
pacman -S vim
25. Next, run visudo to edit the sudoers file.
visudo
Add this line.
%wheel ALL=(ALL) ALL
Save and exit.
26. Next, install the DHCP server and enable it to start on boot time.
pacman -S dhcpcd
systemctl enable dhcpcd
27 In the last step, install the Boot Loader for Arch to boot up after restart. The default boot loader for Linux distributions and Arch Linux also is represented by the GRUB package.
To install the GRUB boot loader in UEFI machines on the first hard disk run.
pacman -S grub efibootmgr dosfstools os-prober mtools

28. Next, create the EFI sub-directory in the /boot directory to mount the EFI partition which is /dev/sda1 as we saw earlier.
mkdir /boot/EFI
Now mount the EFI partition.
mount /dev/sda1 /boot/EFI #Mount FAT32 EFI partition
Run the command shown to configure the bootloader file.
grub-install --target=x86_64-efi --bootloader-id=grub_uefi --recheck

29. Finally, create the GRUB configuration file by issuing the following command.
grub-mkconfig -o /boot/grub/grub.cfg

30. Arch Linux is now installed and configured for your box. The last steps needed are to exit the chroot environment, unmount the partitions, and reboot the system by issuing the below commands.
exit
umount -a
reboot
31. After reboot, remove the installation media image and the system will boot directly into the GRUB menu as shown below.
32. After reboot, log in using the regular user you created. You will be prompted to change the password before proceeding any further.
The Arch Linux system contains only the basic software packages needed to manage the system from the command line, with no Graphical User Interface.
Due to its high portability, rolling release cycles, source packages compilation, granular control over installed software, and processing speed, Arch Linux resembles in many ways with Gentoo Linux, but cannot rise to Gentoo’s complex architectural design.
However, managing an Arch Linux system is not recommended for Linux beginners. Linux beginners who want to operate Arch-like systems should first learn Arch Linux principles by installing the Manjaro Linux distribution.