
Arch Linux provides a flexible cutting-edge system environment and is a powerfully suited solution for developing web applications on small non-critical systems because is a completely open source and provides the latest up-to-date releases on kernels and web software for servers and databases.
The main scope of this tutorial is to guide you through complete step-by-step instructions that in the end will lead to installing one of the most used software combinations in Web Development: LAMP (Linux, Apache, MySQL/MariaDB, and PHP/PhpMyAdmin) on Arch Linux.
Requirements
Step 1: Installing LAMP Stack on Arch Linux
1. After minimal system installation with a static IP address and remote system access using SSH, upgrade your Arch Linux box using the pacman utility.
sudo pacman -Syu
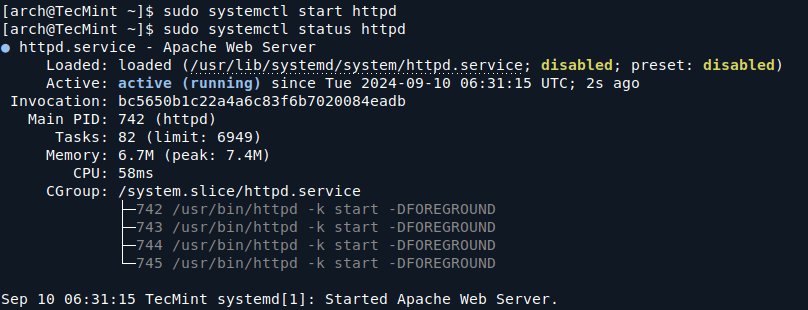
2. When the upgrade process finishes, install LAMP from pieces, first install Apache Web Server, and start/verify every server process daemon.
sudo pacman -S apache
sudo systemctl start httpd
sudo systemctl enable httpd
sudo systemctl status httpd
3. Install PHP dynamic server-side scripting language and its Apache module.
sudo pacman -S php php-apache
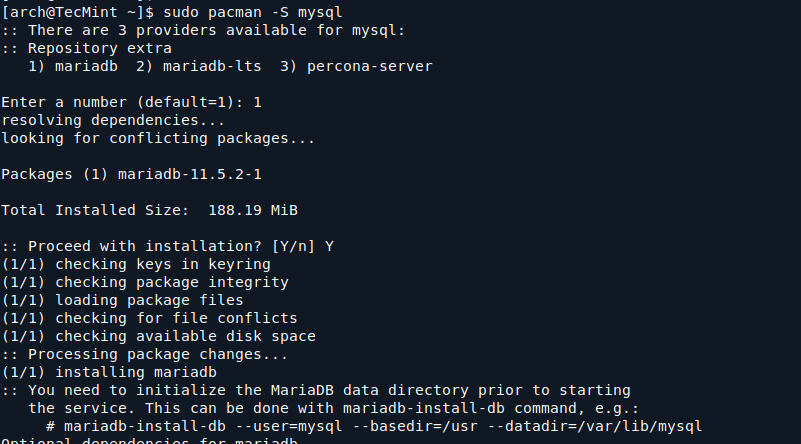
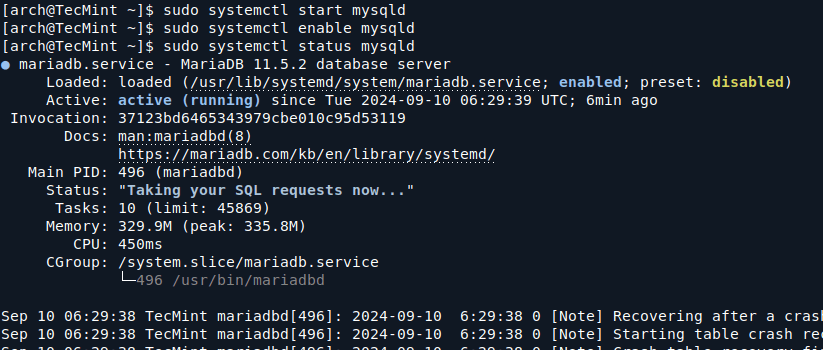
4. On the last step install MySQL database, choose 1 (MariaDB) community database fork then start and check daemon status.
sudo pacman -S mysql
sudo systemctl start mysqld
sudo systemctl enable mysqld
sudo systemctl status mysqld
Now you have the basic LAMP software installed and started with default configurations so far.
Step 2: Secure MySQL in Arch Linux
5. The next step is to secure the MySQL database by setting a password for the root account, removing anonymous user accounts, removing the test database, and disallowing remote login for the user root (press [Enter] key for the root account current password and answer with Yes on all security questions).
sudo mysql_secure_installation


6. Verify MySQL database connectivity by running the following command then leave the database shell with quit or exit statement.
mysql -u root -p

Step 3: Modify Apache Main Configuration File
7. The following configurations are most related to Apache Web Server to provide a dynamic interface for Virtual Hosting with PHP scripting language, SSL, or non-SSL Virtual Hosts and can be done by modifying httpd service file configurations.
First, open the main Apache file configuration with your favorite text editor.
sudo nano /etc/httpd/conf/httpd.conf
At the very bottom of the file, append the following two lines.
IncludeOptional conf/sites-enabled/*.conf
IncludeOptional conf/mods-enabled/*.conf
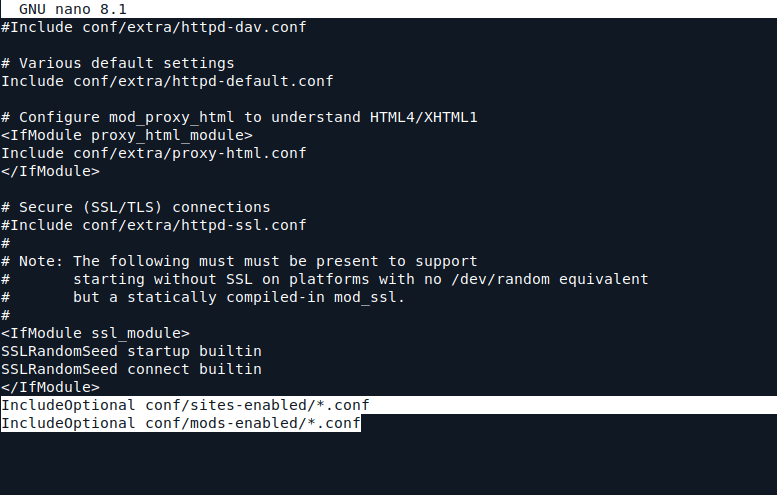
The role of Include statements here is to tell Apache that from now on, it should read further configurations from all files that reside in /etc/httpd/conf/sites-enabled/ (for Virtual Hosting) and /etc/httpd/conf/mods-enabled/ ( for enabled server modules) system paths that end in an .conf extension.
8. After Apache has been instructed with these two directives, create the necessary system directories issuing the following commands.
sudo mkdir /etc/httpd/conf/sites-available
sudo mkdir /etc/httpd/conf/sites-enabled
sudo mkdir /etc/httpd/conf/mods-enabled
The sites-available path holds all Virtual Hosts configuration files that are not activated on Apache, but the next Bash script will use this directory to link and enable websites that are located there.
Step 4: Create a2eniste and a2diste Apache Commands
9. Now it’s time to create a2ensite and a2dissite Apache scripts that will serve as commands to enable or disable the Virtual Host configuration file.
Type the cd command to return to your $HOME user path and create your bash a2eniste and a2dissite scripts using your favorite editor.
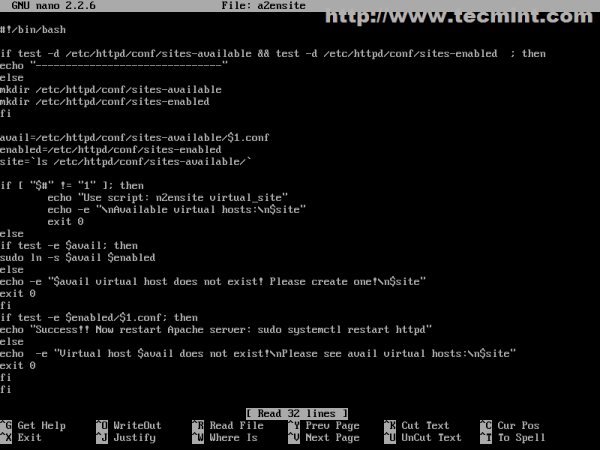
sudo nano a2ensite
Add the following content to this file.
#!/bin/bash
if test -d /etc/httpd/conf/sites-available && test -d /etc/httpd/conf/sites-enabled  ; then
echo "-------------------------------"
else
mkdir /etc/httpd/conf/sites-available
mkdir /etc/httpd/conf/sites-enabled
fi

avail=/etc/httpd/conf/sites-available/.conf
enabled=/etc/httpd/conf/sites-enabled
site=`ls /etc/httpd/conf/sites-available/`

if [ "$#" != "1" ]; then
        echo "Use script: n2ensite virtual_site"
        echo -e "nAvailable virtual hosts:n$site"
        exit 0
else
if test -e $avail; then
sudo ln -s $avail $enabled
else
echo -e "$avail virtual host does not exist! Please create one!n$site"
exit 0
fi
if test -e $enabled/.conf; then
echo "Success!! Now restart Apache server: sudo systemctl restart httpd"
else
echo  -e "Virtual host $avail does not exist!nPlease see avail virtual hosts:n$site"
exit 0
fi
fi
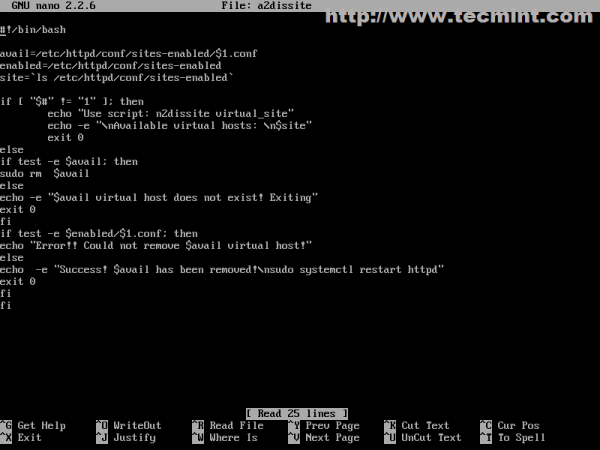
Now create a2dissite bash script file.
sudo nano a2dissite
Append the following content.
#!/bin/bash
avail=/etc/httpd/conf/sites-enabled/.conf
enabled=/etc/httpd/conf/sites-enabled
site=`ls /etc/httpd/conf/sites-enabled`

if [ "$#" != "1" ]; then
        echo "Use script: n2dissite virtual_site"
        echo -e "nAvailable virtual hosts: n$site"
        exit 0
else
if test -e $avail; then
sudo rm  $avail
else
echo -e "$avail virtual host does not exist! Exiting"
exit 0
fi
if test -e $enabled/.conf; then
echo "Error!! Could not remove $avail virtual host!"
else
echo  -e "Success! $avail has been removed!nsudo systemctl restart httpd"
exit 0
fi
fi
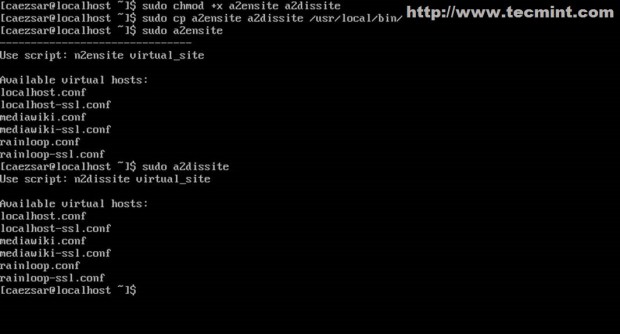
10. After the files have been created allocate execute permissions and copy them to an $PATH executable directory to make them system-wide available.
sudo chmod +x a2ensite a2dissite
sudo cp a2ensite a2dissite /usr/local/bin/
sudo a2ensite
Step 5: Create Virtual Hosts in Apache
11. Virtual Host default configuration file for Apache Web server on Arch Linux is provided by httpd-vhosts.conf file located in /etc/httpd/conf/extra/ path but if you have a system that uses a lot of Virtual Hosts can be very difficult to keep track of what website is activated or not and.
If you want to disable a website you must comment or delete all of its directives and that can be a difficult mission if your system provides a lot of websites and your website has more configuration directives.
Using sites-available and sites-enabled paths greatly simplify the job of enabling or disabling websites and also preserve all your website’s configuration files even whether they are activated or not.
In the next step, we are going to construct the first Virtual Host configuration file for tecmint.com in the sites-available directory that points to the default DocumentRoot path for serving website files (/srv/http.
sudo nano /etc/httpd/conf/sites-available/tecmint.com.conf
Add the following content to configure the virtual host for tecmint.com.
<VirtualHost *:80>
    ServerName tecmint.com
    ServerAlias www.tecmint.com
    DocumentRoot /srv/http/tecmint.com
    ServerAdmin [email protected]

    ErrorLog "/var/log/httpd/tecmint.com-error_log"
    CustomLog "/var/log/httpd/tecmint.com-access_log" combined

    <Directory "/srv/http/tecmint.com">
        Options Indexes FollowSymLinks
        AllowOverride All
        Require all granted
    </Directory>
</VirtualHost>
The most important statements here are Port and ServerName directives that instruct Apache to open a network connection on port 80 and redirect all queries with domain name to serve files located in /srv/http/tecmint.com path.
12. Next, create the document root directory for tecmint.com with appropriate permissions.
sudo mkdir -p /srv/http/tecmint.com
sudo chown -R $USER:$USER /srv/http/tecmint.com
sudo chmod -R 755 /srv/http/tecmint.com
13. Enable the tecmint.com virtual host by creating a symlink in the sites-enabled directory.
sudo ln -s /etc/httpd/conf/sites-available/tecmint.com.conf /etc/httpd/conf/sites-enabled/
14. After the virtual host configuration file has been created, activate it then restart the httpd daemon to view changes.
sudo a2ensite tecmint.com
sudo systemctl restart httpd
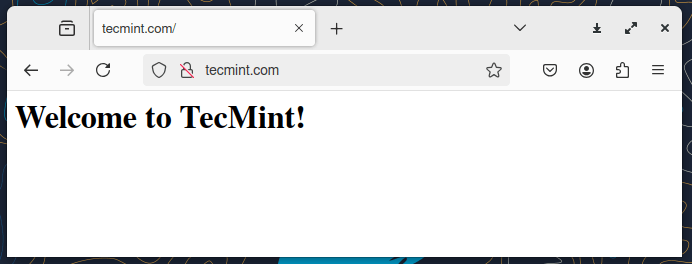
15. To verify the virtual host, create a simple index.html file for testing.
echo '<h1>Welcome to TecMint!</h1>' | sudo tee /srv/http/tecmint.com/index.html
and then point your browser to https://tecmint.com, if you run it from an Arch system or http://Arch_IP if you use a remote system.
Step 6: Enable SSL with Virtual Hosting on LAMP
16. SSL (Secure Sockets Layer) is a protocol designed to encrypt HTTP connections over networks or the Internet, which makes data flow to be transmitted over a secure channel using symmetric/asymmetric cryptography keys and is provided in Arch Linux by mod_ssl and Certbot packages.
sudo yum install certbot python3-certbot-apache mod_ssl
17. Next, use certbot to automatically obtain and install the SSL certificate for your domain.
sudo certbot --apache -d tecmint.com -d www.tecmint.com
Certbot will automatically configure Apache to use the obtained SSL certificate and it will also set up automatic HTTP to HTTPS redirection.
18. Again point your browser to your domain name, but this time using HTTPS protocol – https://tecmint.com – this time you can now see your Apache Virtual Host serves the same content using an HTTPS secure connection.
Step 7: Enable PHP for Apache on Arch Linux
19. By default Apache only serves HTML static file content in Arch Linux with no dynamic scripting language support.
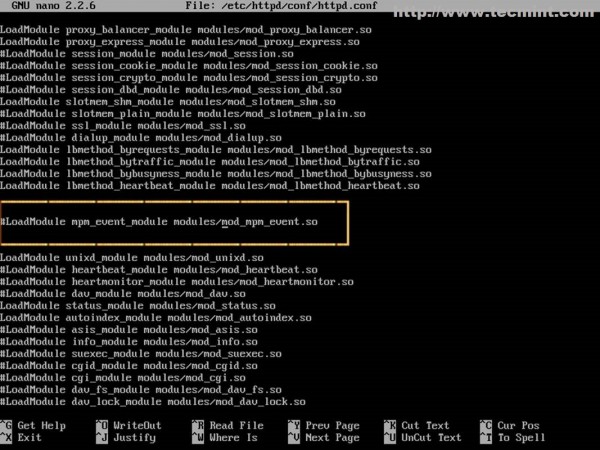
To activate PHP first open Apache main configuration file, then search and uncomment the following LoadModule statement (php-apache does not work with mod_mpm_event in Arch Linux).
sudo nano /etc/httpd/conf/httpd.conf
Using [Ctrl]+[w] search and comment on the following line to look like this.
#LoadModule mpm_event_module modules/mod_mpm_event.so
20. Then create a new file for the PHP module in the mods-enabled path with the following content.
sudo nano /etc/httpd/conf/mods-enabled/php.conf
Add the exact following content (you must use mod_mpm_prefork).
LoadModule mpm_prefork_module modules/mod_mpm_prefork.so
LoadModule php_module modules/libphp.so
AddHandler php-script .php
Include conf/extra/php_module.conf
21. To verify the setting create PHP a file named info.php in your DocumnetRoot (/srv/http/tecmint.com), then restart Apache and point your browser to the info.php file: https://tecmint.com/info.php.
echo "<?php phpinfo(); ?>" | sudo tee /srv/http/tecmint.com/info.php
sudo systemctl restart httpd

That’s it! If everything looks like the image above, you now have PHP dynamic server-side scripting language enabled on Apache and you can now develop websites using Open Source CMS like WordPress for example.
If you want to verify Apache syntax configurations and see a list of loaded modules without restarting the httpd daemon run the following commands.
sudo apachectl configtest
sudo apachectl -M
Step 8: Install PhpMyAdmin in Arch Linux
22. If you don’t master the MySQL command line and want simple remote access to the MySQL database provided through the web interface then you need the PhpMyAdmin package installed on your Arch box.
sudo pacman -S phpmyadmin
23. After the packages have been installed you need to enable some PHP extensions (mysqli.so for internal authentication) and you can, also, enable other modules needed for future CMS platforms like openssl.so, imap.so or iconv.so etc.
sudo nano /etc/php/php.ini
Locate and uncomment the above extensions.
extension=mysqli.so
extension=mysqli
mysqli.allow_local_infile = On
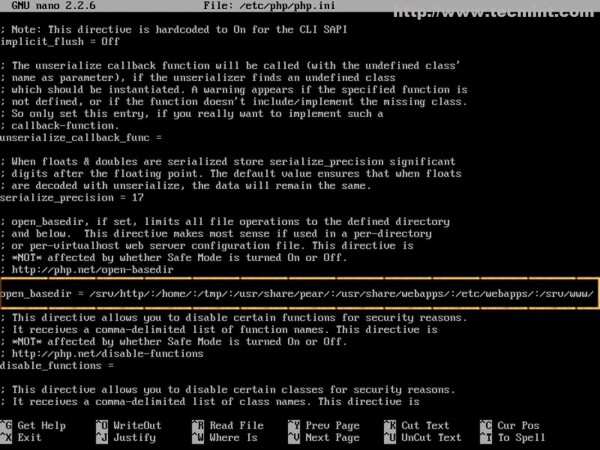
Also, on the same file, search and locate open_basedir statement and add PhpMyAdmin system path (/etc/webapps/ and /usr/share/webapps/) to make sure PHP can access and read files under those directories (If you, also, change Virtual Hosts DocumentRoot path from /srv/http/ to another location you need to append the new path here too).
open_basedir = /srv/http/:/home/:/tmp/:/usr/share/pear/:/usr/share/webapps/:/etc/webapps/
24. The last thing you need to do in order to access PhpMyAdmin Web Interface is to add PhpMyAdmin Apache statements on Virtual Hosts.
As a security measure will make sure that the PhpMyAdmin Web Interface can be accessible only from localhost (or system IP address) using HTTPS protocol and not from other different Virtual Hosts. So, open your tecmint.com.conf.conf Apache file, and at the bottom, add the following content.
sudo nano /etc/httpd/conf/sites-available/tecmint.com.conf
Add the following configuration to ensure proper access:
Alias /phpmyadmin "/usr/share/webapps/phpMyAdmin"

<Directory "/usr/share/webapps/phpMyAdmin">
    DirectoryIndex index.html index.php
    AllowOverride All
    Options FollowSymlinks
    Require all granted
</Directory>
25. Afterwards restart the Apache daemon and create a symbolic link between the /usr/share/webapps/phpMyAdmin/ path and our newly defined Virtual Host path (/srv/http/tecmint.com).
sudo systemctl restart httpd
sudo ln -s /usr/share/webapps/phpMyAdmin/ /srv/http/tecmint.com/
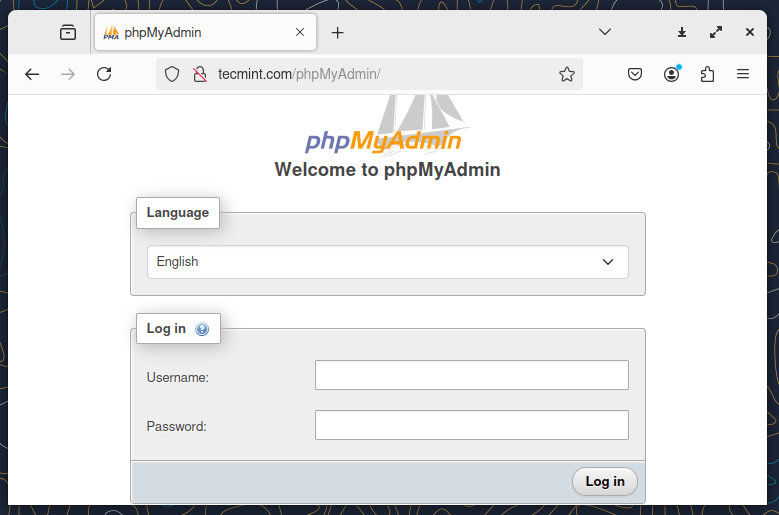
26. Finally point your browser to the following address and you should be able to access your PhpMyAdmin Web Interface at:
https://tecmint.com/phpmyadmin
OR
https://system_IP/phpmyadmin
These are some of the main configuration settings on LAMP needed to transform an Arch Linux system into a simple but powerful, fast, and robust web platform with cutting-edge server software for small non-critical environments.
If you get stubborn and still want to use it in a large production environment you should arm yourself with plenty of patience pay extra attention to package updates and make regular system backup images for a fast system restoration in case of system failures.