
FTP servers are the piece of software that allows you to create an FTP connection between your local computer and a web server. ProFTPD is an FTP server for Unix/Linux servers, very configurable and very effective, it is free & open-sourced, and released under the GPL license.
In this article, we’ll walk you through how to install and configure ProFTPD on Ubuntu and Debian systems. We’ll cover installing the server, setting up user accounts, configuring it for security, and testing the setup.
Step 1: Install ProFTPD Server in Ubuntu
Of course, you need to install the software in order to use it. First, make sure that all your system packages are up-to-date by running the following apt commands in the terminal.
sudo apt update
sudo apt upgrade
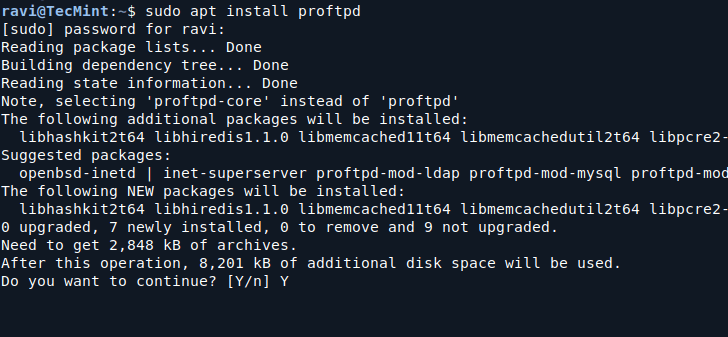
Once the system has the latest security patches and software updates, install the ProFTPD server by running the following command.
sudo apt install proftpd
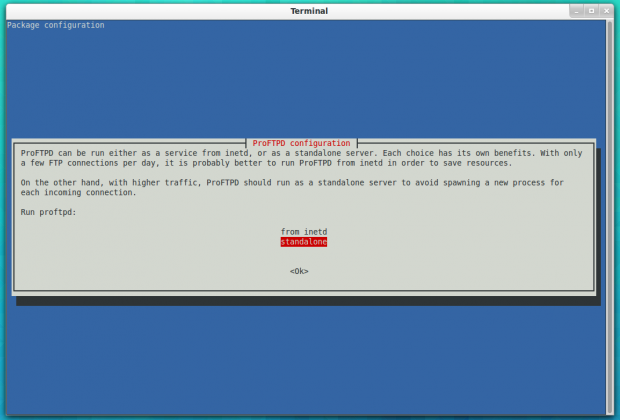
While installing, it will ask you to choose the usage type you want for your ProFTPD server, you may choose the best mode that fits your needs.
- Standalone: ProFTPD runs independently and handles all connections.
- inetd: ProFTPD runs as a service under the inetd super-server.
For most setups, Standalone mode is recommended as it allows for better performance and easier management.
After the installation is complete, ProFTPD will automatically start and you can verify that the service is running by using:
sudo systemctl status proftpd
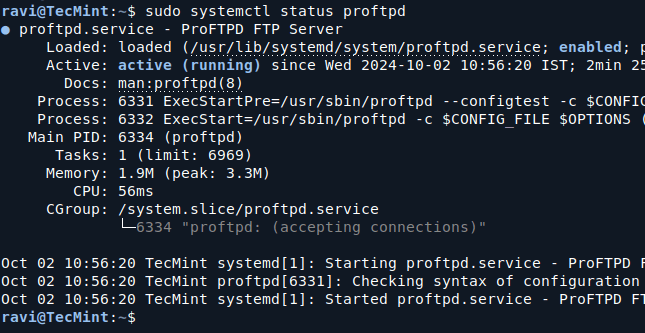
If ProFTPD is running correctly, you’ll see its status as “active (running)“.
Step 2: Configure ProFTPD Server in Ubuntu
Before start using it, we’ll need to edit some files, the /etc/proftpd/proftpd.conf is the default configuration file for Ubuntu/Debian servers, to start editing it using the nano editor as shown.
sudo nano /etc/proftpd/proftpd.conf
Here are a few basic configuration settings you might want to change to suit your needs:
1. The ServerName is the name of your FTP server, you can use your domain name or a custom name for easy identification.
ServerName "MyFTPServer"
2. The DefaultRoot to ensure FTP users are confined to their home directories and can’t navigate the entire filesystem, uncomment this line by removing the # in front:
DefaultRoot ~
3. By default, FTP operates on port 21. If you want to use a different port (for example, for security reasons), change the port number here:
Port 2121
4. The MaxInstances setting controls how many clients can be connected at the same time. You can adjust this according to your needs:
MaxInstances 30
5. If you want to disable anonymous access for security reasons, ensure the Anonymous section looks like this:
<Anonymous ~ftp>
  User ftp
  Group nogroup
  # We want clients to be able to login with "anonymous" as well as "ftp"
  UserAlias anonymous ftp
  # Limit the maximum number of anonymous logins
  MaxClients 10
  # Disallow login
  <Limit LOGIN>
    DenyAll
  </Limit>
</Anonymous>
After making these changes, save the file and restart the ProFTPD service to apply the changes:
sudo systemctl restart proftpd
During ProFTPD installation, a default “proftpd” user is created automatically, but we’ll need to create a password for it, to do so, run.
sudo passwd proftpd
Step 3: Creating ProFTPD Users
ProFTPD can use your system’s regular user accounts for FTP access, which means you don’t need to create separate FTP accounts if your users already have accounts on the server.
To create a new user for FTP access, use the following adduser command:
sudo adduser ftpuser
You’ll be prompted to enter a password and some optional information for the new user. This account will now be able to log into the FTP server using their username and password.
If you want this user to be restricted to their home directory, ensure the DefaultRoot ~ option is set in the proftpd.conf file, as mentioned earlier.
Step 4: Secure ProFTPD Server
FTP is inherently insecure because it transmits data, including usernames and passwords, in plain text. To enhance security, you should configure ProFTPD to use FTPS, which adds encryption using SSL/TLS.
If you don’t have SSL certificates, you can generate a self-signed certificate for testing purposes. For a production environment, it’s recommended to use a certificate from a trusted Certificate Authority (CA).
To generate a self-signed SSL certificate:
sudo openssl req -x509 -newkey rsa:2048 -keyout /etc/ssl/private/proftpd.key -out /etc/ssl/certs/proftpd.crt -days 365 -nodes
After generating the certificate, edit the proftpd.conf file again to enable FTPS.
sudo nano /etc/proftpd/proftpd.conf
Add or uncomment the following lines:
<IfModule mod_tls.c>
   TLSEngine on
   TLSLog /var/log/proftpd/tls.log
   TLSProtocol SSLv23
   TLSRSACertificateFile /etc/ssl/certs/proftpd.crt
   TLSRSACertificateKeyFile /etc/ssl/private/proftpd.key
   TLSVerifyClient off
   TLSRequired on
</IfModule>
After making these changes, restart ProFTPD:
sudo systemctl restart proftpd
Step 5: Test FTPS Connection
To test your FTPS setup, you can use an FTP client like FileZilla or any other client that supports FTPS.
- Open your FTP client and create a new site profile.
- Enter the FTP server’s IP address or domain name, username, and password.
- In the connection settings, choose FTPS or FTP over SSL/TLS.
If everything is set up correctly, you should be able to connect securely to your ProFTPD server.
Step 6: Manage Firewall Settings
If you are running a firewall (like UFW), you’ll need to allow FTP traffic through the firewall.
To allow standard FTP:
sudo ufw allow 21/tcp
For FTPS (if you’re using it on a different port), you’ll need to allow that port too. For example, if you changed the port to 2121:
sudo ufw allow 2121/tcp
After making these changes, restart the firewall:
sudo ufw reload
Step 7: Testing the FTP Server
To test if your ProFTPD server is working, use a browser or FTP client. You can connect to your FTP server with the following syntax:
ftp://<server-ip-or-domain>
Log in with the FTP user account you created earlier. You should be able to upload, download, and manage files on the server.
Step 8: Troubleshooting ProFTPD
Any available error messages will be stored in /var/log/proftpd/proftpd.log by default, you may check this file if your ProFTPD server installation isn’t working.
You must also note that sometimes it happens that the ProFTPD server lags and you can’t access the server due to the “Connection Refused” message, it is not a problem, all you have to do is to keep restart the ProFTPD server until it works (in case if there were no other errors).
Conclusion
You’ve successfully installed and configured ProFTPD on Ubuntu and Debian systems. This guide covered the basic installation, configuration, security setup with SSL/TLS, and firewall adjustments. You now have a flexible and secure FTP server for your file transfer needs.
For advanced configuration, such as limiting bandwidth, setting up virtual users, or enabling anonymous uploads, consult the ProFTPD documentation. Always make sure to secure your server and keep your software up to date for maximum security.