
If you’re using Ubuntu and want to improve your system’s performance, especially on machines with limited RAM, ZRAM is a great solution, as it creates a compressed block device in RAM, which helps to manage memory more efficiently.
What is ZRAM?
ZRAM is a Linux kernel module that allows you to create a compressed block device in RAM, that effectively increases the amount of usable memory on your system by compressing data stored in RAM, which can be especially useful for systems with limited physical memory, allowing them to run more applications simultaneously without slowing down.
This guide will walk you through installing and configuring ZRAM on Ubuntu.
Step 1: Check Ubuntu RAM Usage
Before installing ZRAM, it’s good to know how much RAM your system is currently using by running the free command.
free -h

This command shows your total, used, and free memory. Keep this information in mind to see how ZRAM improves your system performance later.
Step 2: Install ZRAM in Ubuntu
ZRAM is included in the Linux kernel, so you only need to load the ZRAM module and verify it.
sudo modprobe zram
lsmod | grep zram
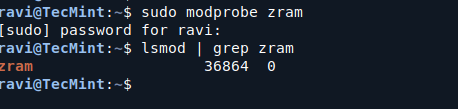
If you see zram in the output, it means the module is successfully loaded.
Step 3: Configure ZRAM in Ubuntu
Next, you’ll need to configure ZRAM to use it effectively, which involves creating a script that will set up ZRAM with your desired configuration.
sudo nano /etc/systemd/system/zram.service
Copy and paste the following configuration into the file.
[Unit]
Description=ZRAM Configuration
After=local-fs.target

[Service]
Type=oneshot
ExecStart=/usr/sbin/modprobe zram
ExecStart=/bin/sh -c 'echo 2G > /sys/block/zram0/disksize'
ExecStart=/bin/sh -c 'mkswap /dev/zram0'
ExecStart=/bin/sh -c 'swapon /dev/zram0'
RemainAfterExit=yes

[Install]
WantedBy=multi-user.target
Note: Change 2G in the ExecStart line that sets disksize to the size of the ZRAM you want. You can set this to any size depending on your system’s RAM. A common practice is to set it to 50-100% of your RAM size.
Now start and enable the ZRAM service with the following commands.
sudo systemctl daemon-reload
sudo systemctl enable zram.service
sudo systemctl start zram.service
After starting the service, you can check if ZRAM is active and being used.
swapon --show
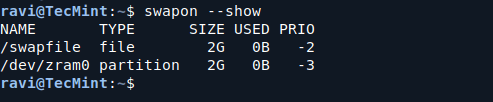
You should see /dev/zram0 listed, indicating that ZRAM is active and serving as a swap space.
Step 4: Monitor ZRAM Memory Usage
To see how ZRAM is affecting your memory usage, you can use the free -h command again:
free -h
You should notice that the amount of free memory has increased, as ZRAM allows your system to use compressed memory effectively.
Step 5: Adjust ZRAM Configuration (Optional)
If you find that your system is not performing as expected, you might want to adjust the size of ZRAM.
To do this, stop the ZRAM service.
sudo systemctl stop zram.service
Open the configuration file you created earlier.
sudo nano /etc/systemd/system/zram.service
Change the disksize value to your desired size, then start the ZRAM service again.
sudo systemctl start zram.service
Conclusion
Using ZRAM on Ubuntu can significantly improve your system’s performance, especially if you have limited RAM. By following the steps in this guide, you can easily install and configure ZRAM to better manage your system’s memory.